

In this guide, we’ll walk you through adding a Rain / Snow sensor to your existing ESP32 based Lora Meshtastic Node. This guide will work also for any ESP32-based board like Heltec V3 Lora, TTGo, or T-Beam with some modifications.
FPV Drone Build Under 300$ With Goggles & Controller
Learn how to build a custom FPV drone for under $300, complete with goggles and a controller. Our guide provides step-by-step instructions and carefully curated component selections. Start your FPV journey today!
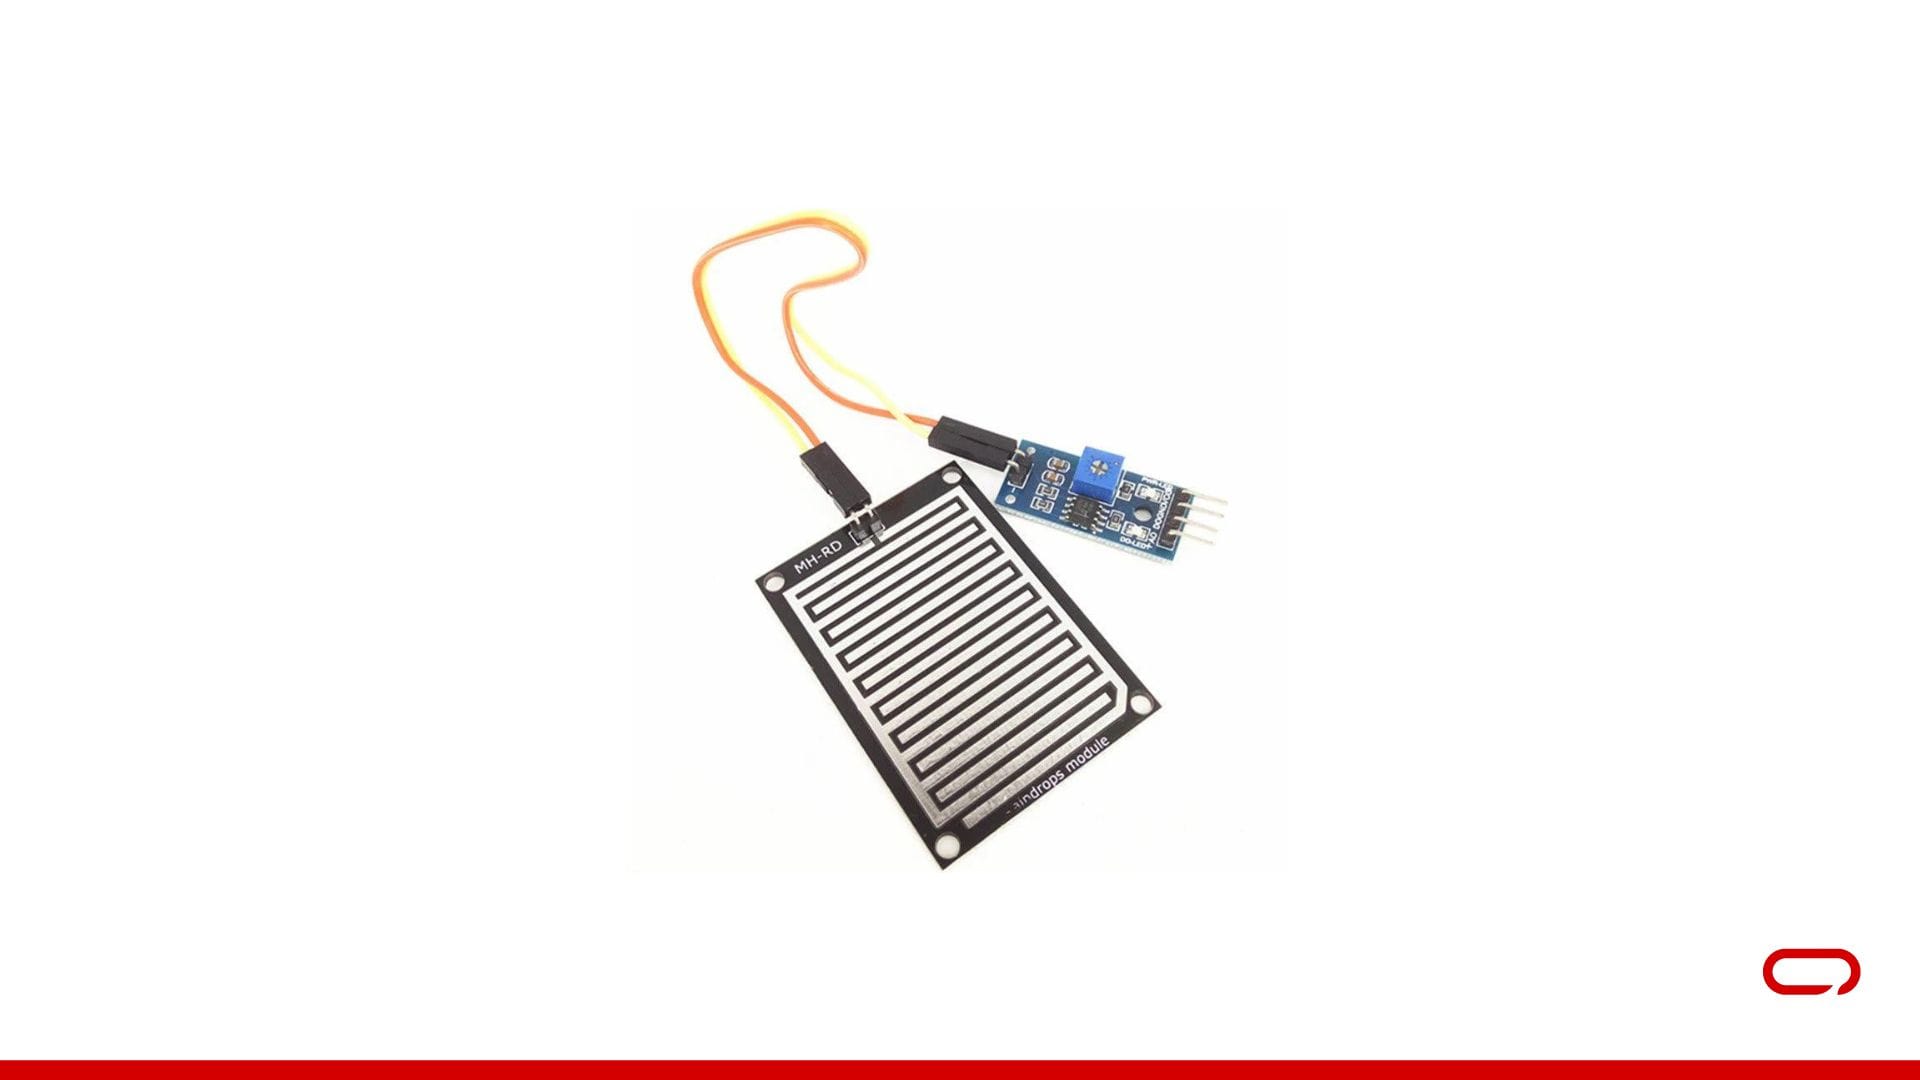
Hardware
Now let’s get started with the hardware you need:
🛑
The item is priced at $4.03 but is listed as a shipping fee. Please be aware that if you request a refund, the shipping fee is non-refundable. This is a common tactic used by AliExpress sellers to avoid issuing refunds.
📢
When ordering from AliExpress, consider consolidating your purchases from a single seller to maximize savings. For instance, if you’re purchasing an antenna from seller X, check if they also offer an IPEX to SMA-K cable. By sourcing all your items from one seller, you can significantly reduce shipping costs.
Assembly
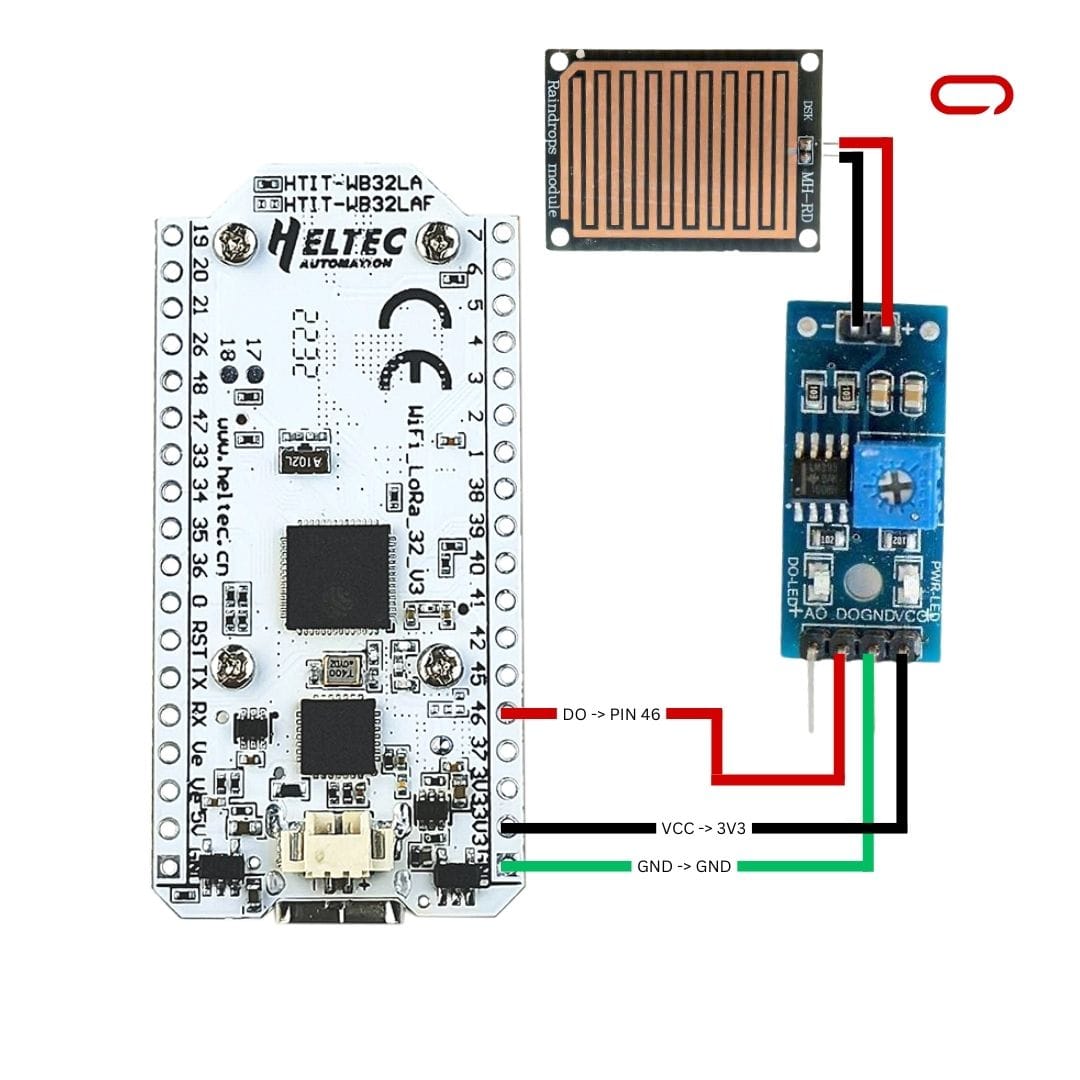
The hardware is all ready and set now to the wiring. For this, we will follow the following Schematics.
Rain Raindrops Detection Sensor 3V – Heltec Lora v3
Rain Raindrops Detection Sensor 5V – Heltec Lora v3
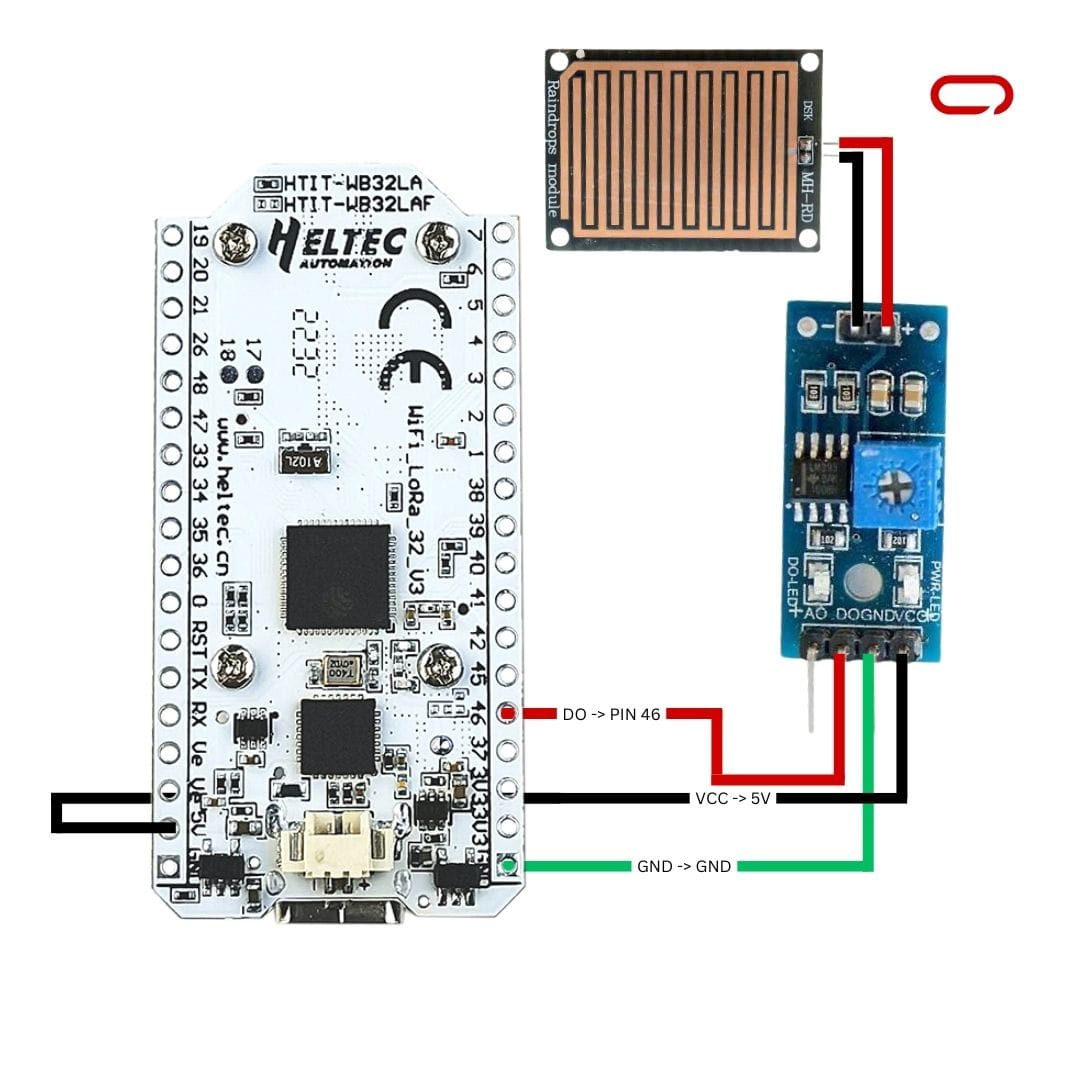
- VCC -> 3V3 5V
- DO -> PIN 46 / or Any other empty PIN of your choice
- GND -> GND
💡
The Rain Raindrops Detection Sensor Module Will Not Work With a Battery, It Works Only With a USB, if you decide to use 5V for the Heltec Boards
💡
If you’re using a different ESP32-based board likeHeltec V3 Lora,TTGo, orT-Beam, simply select an available GPIO pin that accepts digital signals, supports pull-up or pull-down resistors, and isn’t already in use. Then, follow the guide using the chosen pin, disregarding the specific pin number mentioned in the instructions
💡
Capacitors are good practice for decoupling one part of a circuit from another
💡
It’s Important To Note That The Order Of The Connections Might Vary. Follow The Labels And Io Ports On Your Specific Components And The Provided Schematics To Ensure Accurate Wiring. Paying Attention To These Details Ensures That You Establish The Correct Connections And Avoid Potential Issues or Damaging Your Components
Once all the wiring is completed. Double-check your connections and ensure they match the suggested layout before proceeding to the next steps.
Meshtastic Settings
On the Sensor Device
- Open Meshtastic App (IOS for this guide)
- Go to the Settings page
- In the module configuration section go to Detection Sensor
- Toggle the switch to enable Enable
- Give the sensor a name
- Set GPIO PIN to monitor to PIN 46
- Lastly, press Save
💡
Detection Trigger High is off for this module since it pulls low when rain/snow is detected and high on idle. If you are using a different sensor or your sensor behaves otherwise switch it on
On the Client Device
- Open Meshtastic App (IOS for this guide)
- Go to the Settings page
- In the module configuration section go to Detection Sensor
- Toggle the switch to enable Enable
- Right under the toggle select Client this time.
- Lastly, press Save
Once this is set up, you’ll receive messages on the public channel whenever the sensor is triggered. It’s worth noting that if your sensor is expected to be triggered frequently, consider setting a limit in the settings. Saturating the network could potentially lead to issues with sending and receiving data. Check out or Channel Utilization post for more information
Understanding and Optimizing Channel Utilization in Meshtastic Devices
Channel utilization is the key to efficient communication. Whether you’re engaged in long-range communication, participating in a Helium network, or using other compatible devices like LoRaWAN, monitoring and optimizing channel utilization is crucial for a healthy network.
In conclusion, this comprehensive guide ensures seamless integration of a rain / snow sensor into your ESP32 based Lora node or any other ESP32-based board like ESP32 DIY Lora, TTGo, or T-Beam Meshtastic Node, extending its capabilities. The instructions provided are for Heltec Lora V3, yet you can also apply to any other ESP32-based with minor adjustments. Remember to be mindful of network usage to optimize data transmission. This guide not only enhances your device with a rain / snow sensor but also opens up possibilities for incorporating other sensors. Explore the potential of your Meshtastic Node by experimenting with diverse sensors and configurations, broadening the scope of applications for your mesh network. Happy tinkering and discovering new horizons!


